Sunday, 13 October 2013

Potato, Pea and Green Bean Samosas

This moorish and spicy Indian vegetarian snack will have you coming back for more ... and more ... and more! Perfect to make and then freeze - you can keep a stock of them and just pull them out as required and even deep fry from frozen.

I like to serve with either plain yoghurt or a mint and coriander yoghurt dip cos that's just the kind of guy I am!


Cost per samosa: 0.50 zl (that's 10 UK pence, my friends, and 16 US cents)

You'll need for the filling:

- around 2-3 boiled and mashed potatoes (use your leftovers!)
- a handful of frozen peas
- a handful of frozen green beans
- 2 finely chopped onions
- 2 cloves finely chopped garlic
- 1 inch finely chopped ginger
- 2-3 (depends how hot you like it) finely chopped chillies (red or green, whatever you have in)
- 1 tsp cumin seeds
- 1/2 tsp turmeric
- 1 tsp coriander powder
- 1/2 tsp garam masala
- juice of half a lemon
- salt to taste

1. Cumin seeds in a little oil in a wok. Medium heat.


2. Meanwhile, steam the green vegetables for around 20 minutes till soft


3. Add the onions to the cumin seeds

4. Prep the ginger, garlic and chillies


4. After around 5 minutes, add the ginger and garlic


5. After another 5 minutes, chillies in


6. Spices in


7. Potatoes in


7. Lemon juice


8. Get the veg in and check seasoning. Add more salt if required


9. Congratulations! The filling is ready!


You'll need for the pastry:

- 1/2 kg plain flour
- 1-2 tsp salt
- 2 tbsp veg oil
- water to bind

1. Get the flour in a bowl. Mix in the salt. Make a well in the middle


2. Pour the oil in the well


3. Work in with your hands - make sure the flour and oil are well combined


4. Work in some water little by little. Get your hands in there! Make a stiffish dough.


5. Leave the dough to rest in the fridge for 15 minutes.

6. Divide the dough into pool-ball sized lumps. Flour a surface and roll one out this thin:


7. Divide this in two. It's good for 2 samosas. Take one of the halves. Fold over from one side to the other like this and seal by pressing the join together as so:


8. Take this cone in your hand and open up ready to fill like this:


9. Fill that baby!


10. Close over the top and press to seal like this:


Or like this if you like:


11. Bag up (separate plastic bags so they don't stick together) and freeze! But keep 2 out because we'll be frying them up in a sec!

You'll need for the dip:

- a handful of coriander leaves
- a handful of mint leaves
- 1 large chopped green chilli
- salt and pepper to taste
- 1 tsp brown sugar (how come you taste so good?)
- 2 tbsp thick greek yoghurt

1. Whizz all of this up in a blender along with the yoghurt!


2. Get some oil up to temperature in a wok for deep frying. Some might say that you could actually bake these in an oven. I say to thee, bake if you like but that's not a samosa! So, I'll be deep frying, if you don't mind. It might be slightly more calorific but it's the only way to really crisp up that pasty - and that's what we want! Glad you agree with me.


3. Fry till golden brown (around 5 minutes)


4. Fill your face!

What did this cost?

- filling: around 3.2 zl
- pastry: around 1.2 zl
- dip: around 1.6 zl (for a larger quantity)

Total: 6 zl
Makes: 12 samosas
Per samosa: 0.50 zl

Sunday, 6 October 2013

Sourdough Bread

Tasting this for the first time around a month ago totally transformed the way I look at bread. Forget everything you've ever known - all that was wrong. This is the real thing. This is sourdough bread!


What makes sourdough bread different from normal bread? Well, it's the fact that it's not made with yeast as such (certainly not the kind you'd find in a packet) but rather the naturally occurring yeast in our environment. The kind that ferments fruit juice if you leave it out in the open for long enough.

So, how do you capture this yeast so that you can make bread with it? The easiest way is not to capture it at all but to get a "starter" from a friend who already makes sourdough bread. A "starter" is simply 2 tablespoons of risen pre-cooked dough - before you put the sourdough mix in the oven, scoop out 2 tablespoons and put in a jar. Close the lid and leave at room temperature for 2 days. You can then store in the fridge for 8 days. 

What if you haven't got a friend who can give you the "starter"? Well, you'll have to make your own! Combine a tablespoon of flour with a little water in a jar to make a thinnish mix. Cover with a tea towel and leave at room temperature. After around 7 days, it should have started to ferment - you can tell by the "yeasty" smell. Add a little more flour and leave. Repeat for 3 days. You now have a starter. You can tell if it's worked by:

a) the smell
b) it should have little bubbles
c) it should have risen slightly

If you don't get a,b and c, then just try again - it will work in the end.

Once you get this bread right, you'll never want to buy bread from a shop ever again. Trust me on that! The taste is divine. The loaf will feed one person for around 5 days and it will not go bad in any way in those 5 days. Day 5 will taste like day 1. 2 slices and you're satisfied for hours after. It's the real ingredients, you see. And those seeds - full of essential minerals and fats. Flax is rich in Omega 3, to give just one example.

Cost per loaf: 5 zl

What you'll need:

- 2 tbsp of "starter"
- 500g of regular flour
- 200g of rye flour
- 4 tbsp of bran
- 4 tbsp of oats
- 2 tbsp of pumpkin seeds
- 2 tbsp of flax seeds
- 2 tbsp of sunflower seeds
- 2 tsp of salt
- 0.75 litres of lukewarm water

Let's do it!

1. Get the water in a pan


2. Mix up the flours, seeds and salt in a bowl


3. Check the water in the pan is in fact lukewarm (if your little finger can stand it for 10 seconds) and add the "starter"


4. Mix well with an egg whisk


5. Mix in the flours and seeds


6. Leave overnight (or for 8-10 hours) covered at room temperature.

7. Butter up a bread dish and scoop the mix into it


8. Scrape out the remains of the mix from the pan into a jar - this will be the "starter" for your next loaf!


9. Your oven should be up to around 200 degrees - get the dough in!

10. Take out the bread exactly 60 minutes later and enjoy!

What did this cost?

- regular flour: 1 zl
- rye flour: 1 zl
- seeds and the rest: 3 zl

Per loaf: 5 zl

Wednesday, 2 October 2013

Aubergine with black-eyed bean stuffing

There's nothing more satisfying than stuffing an aubergine. That's not quite true because if I really put my mind to it, there are things out there that are more satisfying .. Anyway, stuffed aubergines are cool!

This recipe combines a strong mediterranean feel with black-eyed beans to create a delicious and nutritious wholesome meal without one ounce of meat in sight.


Serves: 2
Cost per person: 4.50 zl (90 UK pence, 23 Czech Kroner)

What shall we use in this, eh?

- one large aubergine
- 1 tomato skinned and cut into cubes
- 1 handful of dried black-eyed beans, soaked overnight and then cooked in boiling water for an hour
- 2 sprigs of rosemary
- 2 cloves of garlic sliced
- salt and pepper to taste
- 1 small chilli finely chopped (not too much - maybe even half a chilli will be enough)
- 2 inches cinnamon
- 1 tsp cumin seeds
- a few liberal glugs of extra virgin olive oil
- around half a pack of feta (or similar cheese) cut into small cubes

Let's get cracking!

1. Boil up the beans in advance. Meanwhile, heat up the oven to 180.


2. Cut the aubergine in half lengthways. Score round the edge leaving a 1-2 cm margin. Be careful not to cut through the skin on the other side


4. Again, careful not to break through the skin, score across the top of the flesh diagonally


5. Put a little oil into a earthenware dish to prevent the aubergine sticking.


6. Place the aubergine in the dish. Cover the surface with a good amount of olive oil: don't be shy! Aubergines like olive oil!


7. Press the fresh rosemary in: this will lend the dish a lovely mediterranean feel


8. Cover the thick garlic slices in olive oil: this will stop them burning to a crisp


9. Work the sliced garlic into the cracks: you'll end up with a wonderfully smokey garlicky texture to the flavour. Season with salt and pepper


10. Put the aubergines into the oven and leave to cook for around 20-30 minutes until brown.

11. Meanwhile, prep the ingredients for the stuffing: tomatoes, onions, chilli, cinnamon and cumin


12. Hot pan. Oil in. Add cumin seeds and cinnamon sticks.


13. Onions in. Low medium temperature


14. Chilli in. Just a hint - you need a little heat in this dish but avoid overpowering.


15. When the onion starts to brown slightly, add the tomatoes


16. Hopefully now that the aubergine will have been in the oven for around 20-30 minutes, it will be ready: check it out!


17. Yup: it's ready! Now, you'll need to gently scoop out the flesh in the middle using a spoon. Use the outer incision as a guide. Be careful to leave a good 2 cm of flesh intact in the shell.


18. You're still sweating down the tomatoes in the pan with onion and chilli, remember? Add the scooped aubergine to it


19. Add the black-eyed beans and season with salt and pepper


20. Now the shells are ready to fill:


21. Press in some feta cubes


22. Pop back into the oven for a further 15 minutes. Voila!


23. Serve with chunky rustic bread (better than the rice I served with)

What did this cost me?

- aubergine: 4 zl
- beans: 0.50 zl
- cheese: 2.50 zl
- the rest: 1 zl
- bread to serve: 1 zl

total: 9 zl
per person: 4.50 zl

Tuesday, 1 October 2013

Black-Eyed Bean curry (Lobia)

Are they black-eyed beans or maybe black-eyed peas? They're both! But since black-eyed peas have no musical worth, I'll be referring to them as black-eyed beans. Makes sense? Yeah.

Lobia = black-eyed beans in the Punjab

Just check this out:


I love cooking with pulses because they cost bugger all and pack a big protein kick. If you spice them right, you won't miss the meat one bit. Oh, and Indian food is so very very spicy. Love it!

This excellent North Indian recipe is very very very nearly vegan and that near miss is because I couldn't resist adding a dollop of cream. Leave it out. Be vegan!

Serves: 4
Cost: 1.25 zl per person (25 UK pence, 62 Kazakhstani Tenge)

You'll need:

- two good handfuls of black-eyed beans soaked overnight then boiled for an hour till soft
- 2 green chillies, 2 cloves of garlic and an inch of ginger whizzed up in a coffee blender to a fine paste
- 2 finely chopped onions
- 2 fresh tomatoes skinned and pureed 
- 1 tsp mustard seeds
- 1 tsp nigella (onion) seeds (optional)
- 1 tsp coriander powder
- 1/2 tsp cumin powder
- 1/3 tsp turmeric powder
- 1/3 tsp red chilli powder

Let's get on it!

1. Soak the beans overnight then boil for an hour till soft

2. Prep the green chilli/ garlic/ ginger paste. Puree the tomatoes and chop those onions real fine, baby.


3. Prep the onion and mustard seeds - these add a subtle pungency and nutty characteristic


4. Prep the powdered spices. Now you're ready to rock!


5. Veg oil in a hot wok. Seeds in


6. When the seeds snap crackle and pop, get the onions in. Sprinkle salt to speed up the cooking process


7. When the onions start to brown, get the chilli/ garlic/ ginger paste in. Cook out the rawness for a couple of minutes


8. Turmeric in


9. Tomatoes in


10. Cook that down nicely for around 5 minutes


11. Get the rest of those spices in!


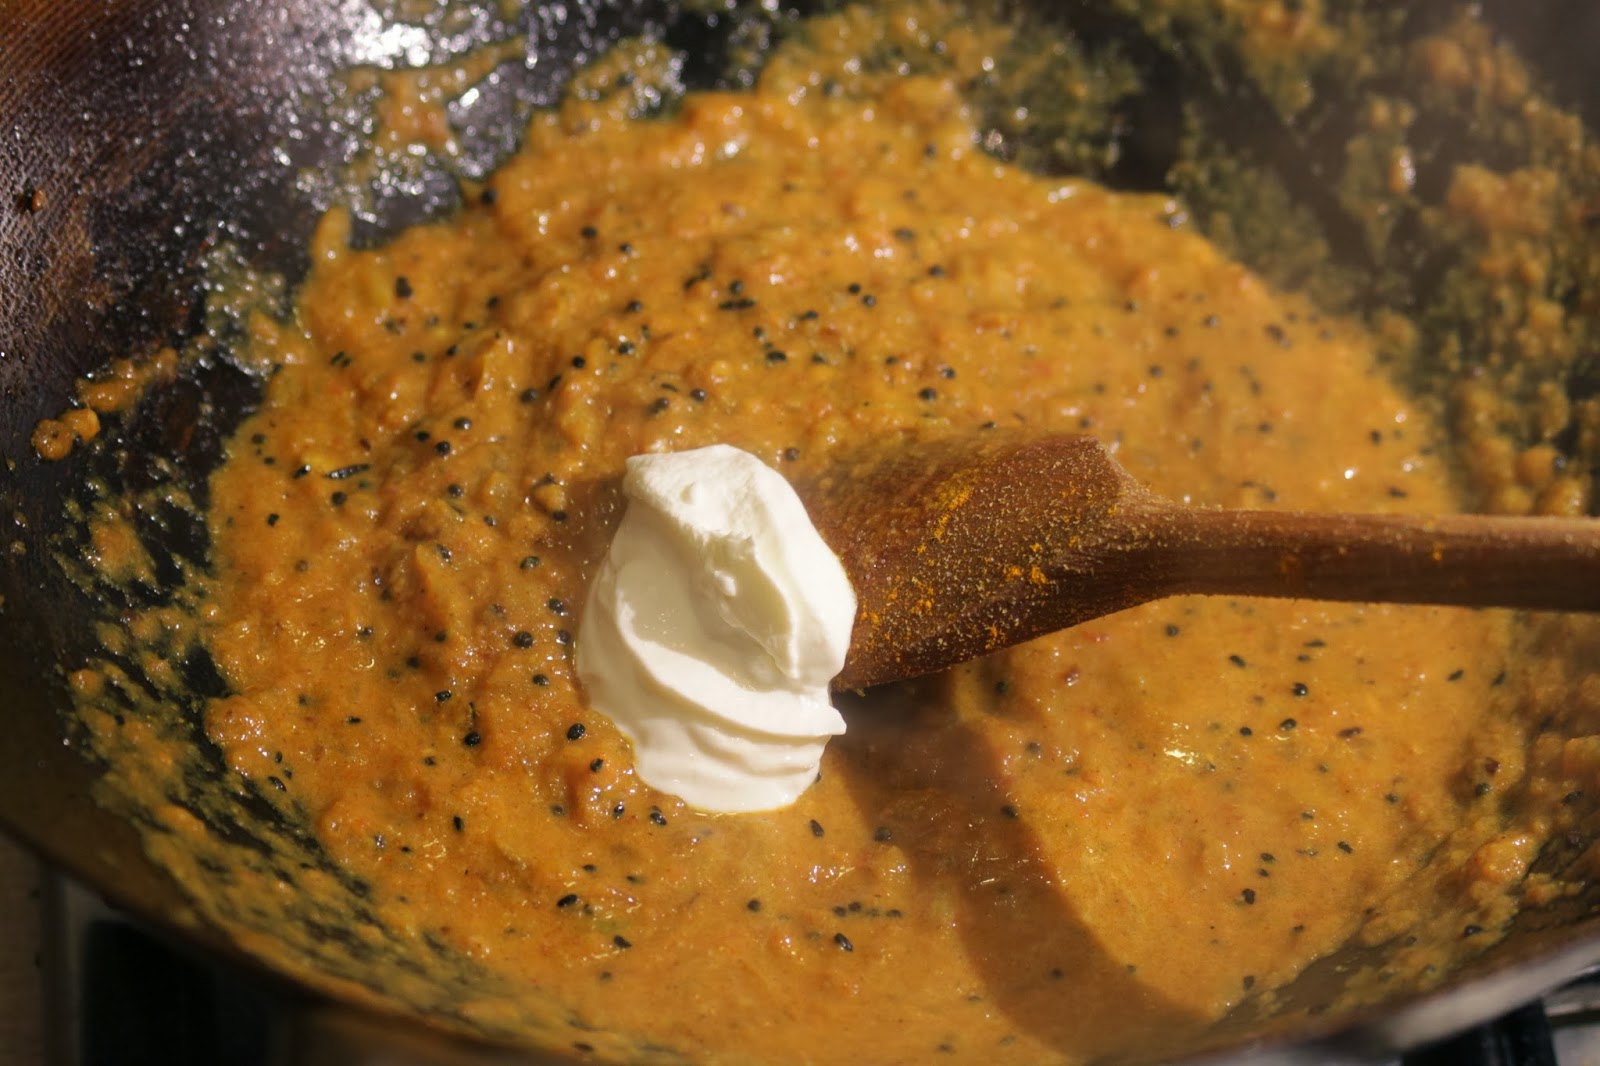
12. Risk a little cream - you naughty boy!


13. Time for the beans! Salt to taste


14. Cook for around 5 minutes more on a low heat - let those beans incorporate themselves into that amazing sauce!

15. Serve with basmati rice


What did this cost?

- beans: 1 zl
- Tomatoes: 1.5 zl
- rice: 1.6 zl
- the rest: 0.9 zl

Total: 5 zl
Serves: 4
Total per person: 1.25 zl